Birch table lamp
Adam picked up the Basisk table lamp recently and incorporated it into a nice piece of birch he found. I love it!
He says, "All I did was saw the birch level with a miter saw, drill a 12mm hole through the middle and inserted the light fixture. I also sanded the top and added felt to the bottom."
See more of his birch lamp on flickr.
Light up with music
Maxd spotted a discarded Ikea Tertial when he helped his sister move. He salvaged it and added a set of speakers to it. Adds a whole new meaning to Light and Sound.
See his Tertial speaker lamp instructions or Maxd's other hack, a bedpost alarm clock and lamp.
Handsfree music stand with light
Laura rehacked a version of the handsfree music stand (made from an Ikea desk lamp). This version adds a lamp onto the stand for instant lighting. She says, "I actually used two Ikea lamps in the process. I disassembled one lamp from its arm. Then, I took the metal clip base off of another metal lamp (can't find it on the site anymore), and screwed the loop at the bottom into the metal arm. Then I screwed a clipboard into the side of the arm."
Skimra light show
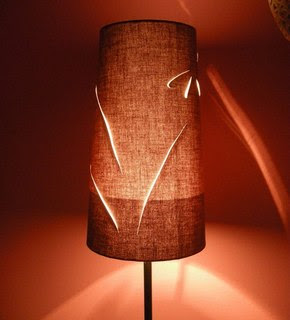
Erin, aka Lilybee, who did the gorgeous Bug Table a while ago is back again with a simple light hack. "It's a lamp I've made using the Grundtal lamp base and Skimra Shade," she says, "it has cut outs that cast light onto the wall and ceiling, in a sort of (not terribly exciting) light show. Weirdly enough it also features bugs."
See her step by step instructions here.
Suspended aquarium lighting
Marc while shopping at Ikea came across these rails in the clearance section and decide that they were perfect for suspending some lighting over his aquarium.
Marc says, "I think they were intended as drawer pulls or maybe refrigerator handles. They were only .49, and using a hacksaw, I was in business.
They were too long for what I needed, so I cut off about 3" from one end. Then I drilled holes in the Sheetrock so that I could pass these through. On the backside, I placed a board with holes drilled just the right size so they would be fit snugly. They are almost impossible to move, which was my goal. The board was screwed to the Sheetrock with Sheetrock screws. The light fixture isn't heavy, so I knew the rails could handle this task, and the board plus Sheetrock on both sides of the wall would keep it from drooping over time.
The hardest part was feeding the steel cabling through the holes in the handles, originally intended for threaded screws. It was pushed in one hole, passed through the rail into the closet area, then back into the other rail and out the other hole. Using fishing line and a tiny bit of electrical tape, a friend and I were able to fish it through after two attempts. Then the light fixture was secured to that cabling. Now I can not only adjust the height by shortening the length of wire, but I can keep the light level since it is on a single loop of wire.
A Cellula chandelier look-a-like
I've also added Christie's version of the DWR Cellula Chandelier to a similar lighting hack. Scroll down that post to view her instructions.


0 comments:
Post a Comment